If you’ve ever stood in front of a machining shop floor, watching a CNC mill glide smoothly through a part, or an automated conveyor system moving components with millimetre-perfect precision, you’ve probably spotted a Ball Square Linear Guide at work. These little workhorses are everywhere—from medical equipment that positions surgical tools to packaging lines that drop products into boxes, and from semiconductor manufacturing equipment that handles tiny wafers to heavy-duty machinery for automotive assembly. But here’s the thing: I’ve talked to dozens of engineers, machinists, and facility managers over the years, and more than a few have told me they’ve made a costly mistake when selecting the right rail length for their ball square linear guides. They pick a size that’s too short, and the guide hits a hard stop mid-operation, causing downtime, scrapped parts, and even damage to the machine. Or they go too long, wasting money on extra material that adds unnecessary weight, increases friction, and drives up energy costs. Ball Square Linear Guide

As a supplier of ball square linear guides, I’ve seen this happen so often that I decided to break down the process of selecting the right rail length in plain, practical terms—no overly complicated engineering jargon, just real-world advice that works for small shops and large facilities alike. Let’s start with the basics, because if you don’t nail down the core requirements, all the extra calculations won’t matter.
First, define your operational travel distance. This sounds simple, but you’d be surprised how many people skip the details here. The travel distance isn’t just how far the carriage moves from point A to point B. It’s the full, unobstructed range of motion your application needs. Let’s use a common example: a CNC router that cuts wooden panels. If the router bit needs to move 1,200 millimetres along the X-axis to cut a full 1,200mm panel, that’s your total travel length. But wait—there’s a catch here. Your ball square linear guide’s rail needs to be longer than that, right? Because the carriage doesn’t sit entirely on the rail when it’s at the extreme ends. Most ball square linear guide carriages have a “load length”—the distance the carriage extends beyond its mounting face. For standard medium-duty carriages, that’s usually about half the length of the carriage itself, but it’s not a one-size-fits-all number. If your carriage is 100mm long, you’ll need at least 50mm of extra rail on each end to accommodate the carriage when it’s at the start and end points of travel. If you forget this, the carriage will run off the rail, or the rail will be too short to house the full range of motion. I once worked with a custom automation engineer who learned this the hard way: he calculated travel distance perfectly, but didn’t add the extra rail length, and his first test run ended with the carriage slamming into the end of the rail, cracking the carriage’s steel housing. It cost him a week of downtime and $2,000 in parts—all because he skipped that small detail.
Next, consider the mounting and installation requirements. How are you attaching the rail to your machine? Is it to a flat metal bed, a cast iron frame, or a custom aluminium extrusion? The mounting method affects the rail length in two key ways. First, you need to leave space for the end caps and mounting holes at each end of the rail. Most ball square linear guide rails have pre-drilled mounting holes spaced at regular intervals—usually every 50mm to 100mm, depending on the rail size. You need at least one full hole spacing beyond the extreme end of the carriage travel to mount the rail securely, without placing a hole too close to the edge. If you mount the rail too close to the end, it can bend under load, leading to misalignment and uneven movement. Second, if you’re installing two parallel rails (which most applications are, for stability), you have to make sure both rails are the exact same length. Even a 1mm difference in rail length between two parallel guides can cause the carriages to bind, increasing friction and shortening the lifespan of the guide. I always advise customers to order both rails in the same batch, from the same supplier, to ensure consistent manufacturing tolerances. We test every rail we ship for length accuracy, so that’s one less thing you have to worry about.
Then, factor in load and dynamic performance. This is where it gets a little more technical, but it’s critical for high-load or high-speed applications. The load on your ball square linear guide doesn’t just affect the rail’s thickness or material—it affects how much the rail deflects under load. Deflection is when the rail bends slightly under the weight of the load, especially at the midpoint of the rail’s length. For most light- to medium-duty applications (like small CNC routers, medical devices, or light packaging lines), a rail length that’s just enough for travel plus end clearance works fine. But if you’re moving heavy loads—say, 1,000kg or more on a robotic arm, or a high-speed gantry for automotive parts—you need to account for deflection. The longer the rail, the more it will bend under load. Excessive deflection leads to positional error, which is a big problem for applications that need sub-millimetre precision. The general rule here is: for heavy loads or high speeds, keep the rail length as short as possible while still meeting your travel needs. Or, if you need a longer rail, upgrade to a thicker, higher-capacity rail that’s designed to resist deflection. We have customers in the heavy machinery sector who used to order extra-long rails “just in case” for high-load applications, but after we explained deflection, they switched to shorter, sturdier rails that cut their costs by 15% and improved their machine’s accuracy by 20%. It’s a win-win.
Another thing to consider: future expansion or adjustments. I’ve worked with a lot of small business owners who built their first machine with plans to scale it up later. If that sounds like you, don’t pick a rail length that’s exactly what you need today—leave a little extra space. For example, if you’re building a packaging line that might need to handle longer boxes in two years, add 200mm to your rail length. It’s much cheaper to add a little extra rail now than to replace the entire rail later, which would mean removing the old rail, re-aligning the machine, and shutting down production for days. That said, don’t go overboard. Extra rail adds weight, which increases the load on the ball bearings and can make your machine less energy-efficient. There’s a balance between current needs and future flexibility.
Now, let’s talk about common mistakes I see all the time. The first is confusing “effective travel” with “rail length.” Effective travel is the distance the carriage can move without hitting the end of the rail. Rail length is effective travel plus twice the clearance needed for the carriage at each end. If your effective travel is 1,000mm, and your carriage needs 60mm of clearance at each end, your rail length is 1,120mm. That’s a simple calculation, but it’s surprising how many people mix those two numbers up. The second mistake is not accounting for the application’s environment. If your machine is operating in a dusty factory, or a wet, washdown environment (like food and beverage processing), you might need longer rail to accommodate seals or wipers that protect the ball bearings from debris. Those seals add a little length to the carriage, which means you need extra rail space. If you skip that, the seals will rub against the end of the rail, causing wear and tear that leads to early failure.
Let’s use a real example to tie this all together. Last year, a customer called us panicking. He owned a small CNC engraving shop, and his old ball square linear guide had failed, causing his machine to shut down mid-job. He’d ordered a replacement rail, measured his travel as 800mm, and ordered an 800mm rail. When he tried to install it, the carriage ran off the end of the rail, and he couldn’t get the full travel he needed. We walked him through the steps: his carriage was 80mm long, so he needed 40mm of clearance at each end. His effective travel was 800mm, so total rail length needed to be 800 + 40 + 40 = 880mm. We sent him a custom-cut 900mm rail (we can cut rails to exact lengths for any customer, no minimum order), and he was back up and running the next day. He told us later he’d never calculated that clearance before, and he’d been lucky with his old rail for three years before it gave out. That’s the kind of mistake that costs you money, but it’s easy to avoid with a little planning.
When you’re ready to make your selection, start with these three steps: 1) Measure your required effective travel, clearly noting the start and end points of the carriage’s movement. 2) Add the necessary clearance based on your carriage size and application type. If you’re using a standard carriage, 40-60mm per end is a good baseline, but check your manufacturer’s specs for your specific carriage. 3) Verify the mounting requirements: make sure the rail has enough space for mounting holes at each end, and if you’re using two parallel rails, order matching lengths. For high-load or high-speed applications, run a quick deflection calculation, or ask your supplier for advice. A good supplier will be able to help you adjust if needed, instead of just selling you a rail that might not work for your application.
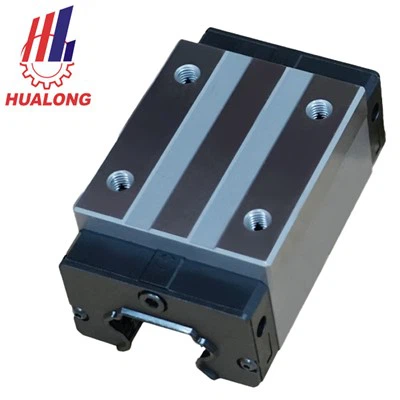
At the end of the day, selecting the right rail length isn’t rocket science. It’s about taking the time to measure what you need, account for the small details that people often skip, and plan for both current use and future needs. As a supplier, our job isn’t just to sell you a ball square linear guide—it’s to make sure it works for your application, keeps your machine running smoothly, and helps you avoid costly downtime. If you’re working on a new project, replacing an old rail, or just have questions about which rail length is right for you, don’t hesitate to reach out. We’re here to help you get it right the first time.
Roller Linear Guide References:
- Thomson Linear Motion. Linear Rail Selection Guide: Rail Length and Installation Requirements. Thomson Industries, Inc., 2022.
- SKF Group. Ball Square Linear Guide Performance: Deflection and Load Calculations. SKF Industrial Technology, 2021.
- ISO 10360-2:2009. Geometrical Product Specifications (GPS) – Acceptance and verification of coordinate measuring machines – Part 2: Coordinate measuring machines for linear dimensions. International Organization for Standardization, 2009.
- Parker Hannifin Corp. Linear Motion Systems for Custom Automation: Length Selection Best Practices. Parker Automation Division, 2023.
Fujian Province Hualong Machinery Co., Ltd.
As one of the leading ball square linear guide manufacturers and suppliers in China, our products have good reputation in the market. Please rest assured to wholesale bulk ball square linear guide made in China here from our factory. Welcome to view our website for more information.
Address: Huangshi Industrial Park, Putian city, Fujian Province, China
E-mail: jenkin@hualongm.com
WebSite: https://www.guidelinear.com/
